- Staining Concrete
- Stamped Concrete
- Concrete Overlays
- Concrete Resurfacing
- Concrete Polishing
- Concrete Dyes
- Colored Concrete
- Indoor Concrete
- Concrete Floors
- Concrete Countertops
- Garage Floor Coatings
- Furniture, Sinks, Fire Bowls
- Basement Floors
- Outdoor Concrete
- Concrete Patios
- Concrete Driveways
- Concrete Pool Decks
- Outdoor Kitchens & Counters
- Outdoor Fireplace
- Concrete Walkways
- Concrete Pavers
- Concrete Walls
- Repair & Maintenance
- Foundation Repair
- Concrete Crack Repair
- Concrete Sealers
- Building with Concrete
- Concrete Homes
- Concrete Basements
- Decorative Concrete
Guide to Pouring Concrete
How to pour concrete, from prep work to curingInstalling concrete is a challenging job and every concrete pour is different. Size, shape, color, finish and complexity of a project all have to be considered when pouring concrete. Use this guide of eight steps in concrete installation to get a better understanding of what takes place before, during and after concrete is placed.
Step 1 - Site Work
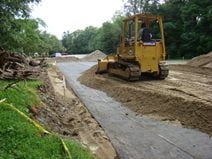
Before concrete can be poured, the site needs to be prepared to reduce the chance of heaving from expansive soils and frost. On small projects, use hand to tools to clear the area of all grass, rocks, trees, shrubs, and old concrete, exposing bare earth. Earth moving equipment speeds up the process, especially for large pours. Then, place and compact a sub base of fill gravel, unless the soil is very compact and stable. Read about subgrades and subbases for concrete slabs.
Step 2 - Forming
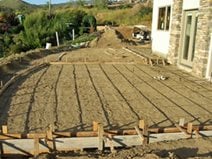
Once the sub base is prepared, forms can be set. For residential concrete projects, use wood forms with metal or wood stakes. Attach forms to the stakes with screws or special nails to allow for easy removal after the concrete has cured. Forms should be in good condition, be set to provide the proper slope or grade for drainage, and form clean corners where they meet each other or other structures. Read about concrete forms.
Step 3 - Mixing
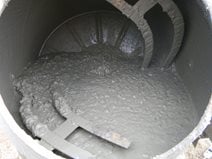
If you're using bagged concrete purchased at a home center, mix the concrete with water according to the package instructions. For small slabs, you can use a wheel barrow and shovel, but renting a concrete mixer can make the process easier. If your concrete arrives in a ready mix truck, the drum on the back of the truck will be spinning to keep the concrete from settling and getting hard.
Hire a pro: Find concrete pouring companies near me.
Step 4 - Placement
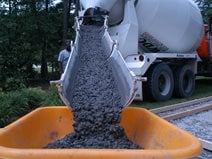
Pour wet concrete into the forms until they are full to the top edge. While the wet concrete is being poured, use shovels, rakes and "come alongs" (special concrete rake) to move the concrete to make sure there are no voids or air pockets. Read more about placing concrete.
Step 5 - Early Finishing
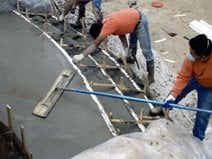
Use a large metal or wood board to screed the top of the concrete. Screeding helps compact and consolidate the concrete, and begins the smoothing and leveling process. Next, use a float to further compact the concrete, even out any high or low areas, and create a smooth finish. Small hand-held floats are good for edges and detail work, large bull floats are best for working large areas. At the same time, work control joints and edges into the concrete with special hand tools. Read more about how to finish concrete.
Step 6 - Troweling
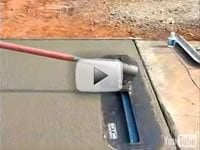
If the concrete will receive a rough broom finish, no additional finishing may be needed. If the concrete will be smooth toweled or stamped, a steel trowel finish is needed. Let the concrete rest until the surface begins to firm up. Once firm, use a steel trowel to create a smooth, hard and uniform finish. Steel troweling can be done by "skating" across the surface on knee boards, troweling small areas at a time, or with tools on long poles known as "fresnos" or "funny trowels". Watch a fresno tool video demonstration.
Step 7 - Final Finishing
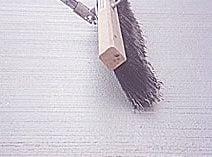
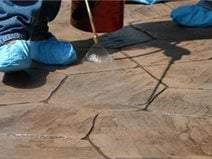
Once all the troweling (float or steel) is complete the final finish can be applied to the concrete. The most basic type of finish is known as a "broom finish". A special broom is pulled across the concrete surface creating a rough textured surface. Other types of finishes include stamped, textured, or smooth trowel to name a few. Read about types of textured concrete finishes.
Step 8 - Curing
Let the concrete can rest and begin to cure (get hard). The curing process lasts 28 days, with the first 48 hours being the most critical. Apply a liquid chemical curing and sealing compound to help the concrete cure slowly and evenly, which helps reduce cracks, curling, and surface discoloration. You can start to use your concrete for light foot traffic 3 to 4 days after placement, and you can drive and park on your concrete 5 to 7 days after placement. Read about curing concrete.
Working with a Concrete Pouring Company
If you need more than just a simple slab poured, get bids from professional concrete contractors. Compare these bids , and make a choice based on referrals, experience, price, scheduling and curb appeal. Once an installer is picked, price and logistics worked out, you should be presented with a contract. The contract needs to clearly state work to be completed, expectations on finish, color, and texture, price, payment schedule and warranty or guarantee information. Once you sign the contract, and pay the deposit (if any), the real work can begin. Read 8 tips for hiring a concrete contractor.
Tips for a Good Pour
- No matter where you live the minimum cement content for any residential concrete should be 470 lb. per yard of concrete.
- If you live in a freeze thaw climate, a minimum of 4% of air entraining admixture should be used to help prevent scaling and spalling.
- Small stone can be used as aggregate in the concrete if it is going to be stamped, vs. regular ¾ inch stone for broom or smooth finish concrete slabs.
- A concrete truck may be able to pull up to the site and pour right into the forms. If the site is on the other side of the house or building, the truck may pour into wheel barrows or a concrete pump to get the wet concrete to the site.
- Concrete should not be placed when temperatures will drop below 20F. The colder the temperature, the longer it will take concrete to cure.
- If concrete is placed in weather below 40˚F, use curing blankets to keep the concrete warm during the initial few days of the curing process.
How to Care for Your New Concrete
Concrete is a durable product, and if placed, finished and cured properly should last a lifetime. While concrete is often viewed as a NO maintenance product, consider the following simple maintenance procedures to increase the service life of your concrete.
- A good quality sealer is always a good idea. Apply a month after the concrete is placed. Exterior concrete sealers can last anywhere from 1 to 5 years, depending primarily on environmental conditions.
- Occasional soap and water cleaning is also advised to keep your concrete looking its best.
- Sealing and regular maintenance will also minimize the chances from staining and discoloration caused by natural or manmade contamination.
Read about cleaning and sealing all types of decorative concrete.
Concrete has been around for thousands of years, and remains the most popular choice for residential patios, walkways, and driveways. When you make the decision to go concrete, understanding the basic steps—from picking a contractor to general maintenance—will make the entire process run smoother for all parties involved.
Related:
9 Types of Concrete Work
Pouring a DIY Concrete Slab
Dry Pouring Concrete
